Pre-Reading Materials
-
![]()
Vibe Coding Essentials - Google Cloud
-
![]()
HTML Games - W3Schools
-
![]()
Game Design - Nuclino
-
![]()
Sample HTML Games - Education.com
-
![]()
How to Start with Github (Build your portfolio)
-
![]()
How to create a website directly from a repository on GitHub
-
![]()
Getting Good Results from Claude Code


HTML Learning and Vibe Coding
(20 hours)
Session 1: Orientation & Digital Creativity
-
Short Description
The first session sets the foundation for the entire bootcamp by welcoming participants, introducing the program’s purpose, and building a sense of community. Students learn what to expect from the course, get to know one another through creative prompts, and collaborate on group agreements that foster an inclusive and supportive learning environment.
Learning Objectives
Introduce the overall goals, phases, and expectations of the bootcamp.
Create a welcoming and inclusive atmosphere where all participants feel comfortable.
Encourage students to begin thinking about themselves as creators and collaborators.
Establish group values and shared agreements for respectful teamwork.
Learning Outcomes
By the end of this section, students will be able to:
Summarize the three phases of the program and describe what they will accomplish.
Identify the end goal of creating and presenting a playable game and digital portfolio.
Share personal interests and inspirations with peers, building initial connections.
Contribute to a community agreement that reflects inclusivity, respect, and encouragement.
Expanded Description
This opening session begins with a clear overview of the bootcamp’s purpose: to explore vibe coding, game design, and Unity development while helping youth grow into confident digital creators. Facilitators outline the program structure — Phase 1 focuses on web-based creative coding, Phase 2 introduces Unity for professional game development, and Phase 3 concludes with a public showcase and portfolio preparation. Students see how their skills will progress step by step, building toward a meaningful final presentation.
Introductions follow the overview, using prompts such as “What’s your favorite game?” or “If you could design one, what would it be about?” These spark creativity and help participants connect with one another in a fun, low-pressure way. Facilitators also share their personal journeys in creative technology to inspire students and model openness.
Finally, the group co-creates community agreements — simple guidelines such as “encourage each other,” “celebrate effort,” and “respect all voices.” A short collaborative activity reinforces teamwork and ensures that students begin to feel like part of a supportive, creative community.
-
Short Description
This part of the session introduces students to the world of creative technology and the entrepreneurial opportunities that come with it. Through real-life examples and discussions, participants learn how coding, game design, and digital creativity connect to careers such as app development, game design, digital art, and content creation. The focus is on showing youth that the skills they are building are not only fun but also relevant to future education, jobs, and even self-employment.
Learning Objectives
Expose students to the range of careers available in creative technology.
Introduce the concept of entrepreneurship and self-directed projects.
Inspire students with real-world stories of creators and innovators.
Help students begin connecting their personal interests to possible future pathways.
Learning Outcomes
By the end of this section, students will be able to:
Identify at least three different career paths in creative technology (e.g., game developer, web designer, digital artist).
Explain how coding and creativity can be combined into entrepreneurial ventures.
Recognize the value of building a personal digital portfolio to showcase skills.
Articulate one personal interest or skill they could connect to a creative tech career.
Expanded Description
In this session, facilitators introduce students to the breadth of creative technology careers. These may include roles such as game developer, interactive media designer, digital illustrator, web developer, or UX designer. By highlighting these roles, students start to see that coding skills are not just technical tools, but keys to creative industries where imagination and technology intersect.
The session also emphasizes entrepreneurship — the idea that youth can create and launch their own games, apps, or digital art projects. Real-world examples of independent game creators, YouTubers, or app developers demonstrate how individuals can turn ideas into income-generating opportunities. This inspires students to see themselves not just as consumers of technology, but as potential innovators.
Students are then guided to reflect on their own personal interests — whether in art, music, storytelling, or gaming — and consider how these could intersect with creative technology. The discussion connects the technical skills they will gain in the program with future pathways, showing them the long-term value of their learning.
By the end, students leave with a sense of possibility: their creative passions and new coding skills could evolve into careers, entrepreneurial ventures, or educational pathways that align with their future goals.
-
Short Description
This section introduces students to the principles of game design and helps them understand what makes a game fun, engaging, and meaningful. Rather than focusing only on coding, students learn about the building blocks of games — rules, goals, mechanics, and player experience. Through discussions and hands-on mini-exercises, they begin to see how design choices directly affect the way people play and enjoy their creations.
Learning Objectives
Teach students the fundamentals of game design: rules, goals, mechanics, dynamics, and aesthetics.
Encourage critical thinking about how games create enjoyment, challenge, and fairness.
Provide opportunities for students to practice designing and evaluating simple game concepts.
Connect theory to practice by linking game design decisions to their coding projects.
Learning Outcomes
By the end of this section, students will be able to:
Explain the difference between game mechanics (rules and systems), dynamics (how players interact), and aesthetics (the feel of the game).
Identify the elements that make a game engaging or frustrating.
Apply basic design principles to adjust a game’s balance, difficulty, or flow.
Create a simple paper prototype or design sketch that demonstrates intentional choices in mechanics and player experience.
Expanded Description
In this session, students explore what makes a game “work.” Facilitators introduce the MDA framework (Mechanics, Dynamics, Aesthetics) as a simple way to think about design. Mechanics are the rules — such as movement, scoring, or win conditions. Dynamics are the strategies that emerge when players interact with those rules. Aesthetics describe the overall experience — is the game exciting, relaxing, competitive, or funny?
To ground the theory, students examine familiar games like tag, chess, or popular mobile apps, discussing why people enjoy them and how small changes in rules can shift the experience. A short exercise in paper prototyping allows students to design a simple game using index cards, dice, or basic prompts. They then playtest each other’s designs, practicing how to give constructive feedback on fun, challenge, and clarity.
By connecting these lessons back to their coding work, students understand that they are not just writing code — they are shaping experiences. This mindset empowers them to design games with purpose, creativity, and empathy for the player.
-
Short Description
This section guides students through the practical steps of preparing their coding tools. Participants learn how to install, configure, and navigate Visual Studio Code (VS Code) — one of the most widely used code editors — as well as explore browser-based environments that allow for coding without heavy setup. The goal is to ensure every student has the confidence and technical readiness to begin coding immediately, whether on their own devices or shared workstations.
Learning Objectives
Introduce students to VS Code as a professional and beginner-friendly coding editor.
Teach the basics of file structure, extensions, and customization in VS Code.
Familiarize students with browser-based coding platforms for accessible, on-the-go coding.
Build confidence in navigating coding environments and solving common setup issues.
Learning Outcomes
By the end of this section, students will be able to:
Install and open VS Code, create and manage project files, and run simple HTML/CSS/JavaScript code.
Use key VS Code features such as syntax highlighting, live server preview, and extensions.
Navigate at least one browser-based environment (e.g., CodePen, Replit, or Glitch) to test and share their projects online.
Troubleshoot common setup challenges (missing extensions, broken file paths, saving files correctly).
Expanded Description
This session emphasizes that having the right tools is the first step to becoming a coder. Students begin by downloading and installing Visual Studio Code, learning how to open and save files, create folders for projects, and use basic features like syntax highlighting and auto-complete. Facilitators introduce useful extensions, such as Live Server for previewing web projects and Prettier for clean formatting, showing how these tools make coding smoother and more enjoyable.
Next, students explore browser-based coding environments. Platforms such as CodePen, Replit, or Glitch provide an accessible way to experiment with code instantly, without worrying about installation. This helps students who may not have consistent access to powerful computers, while also giving them a quick way to share projects with peers and mentors.
The session also introduces the idea of digital portfolios — each project saved in VS Code or shared online contributes to a body of work that can later be showcased. By the end, every student has a functioning coding environment, confidence in navigating it, and the excitement of being fully equipped to start their first creative coding project.
Session 2: HTML, CSS & Interactive Game Elements
-
Short Description
This section introduces students to the foundations of web development: HTML for structure and CSS for design. Students learn how to build the skeleton of a webpage using HTML and then bring it to life with color, fonts, and layout through CSS. By combining these two tools, they begin to understand how code shapes the look and feel of digital experiences.
Learning Objectives
Teach students how to use HTML tags to structure a webpage with headings, paragraphs, links, and images.
Introduce the concept of semantic HTML and why proper structure matters for accessibility.
Demonstrate how CSS controls the visual presentation of HTML, including colors, fonts, and layout.
Encourage creativity by allowing students to experiment with styling their own simple webpage.
Learning Outcomes
By the end of this section, students will be able to:
Create a basic webpage using HTML, including headings, text, links, and images.
Apply CSS rules to customize fonts, colors, backgrounds, and layouts.
Explain the difference between content (HTML) and style (CSS).
Design a simple but personalized webpage that reflects their own ideas or interests.
Expanded Description
Students begin with HTML, the language that provides structure to the web. Facilitators explain that HTML is like the bones of a webpage: tags such as <h1> for titles, <p> for paragraphs, <img> for images, and <a> for links. Through hands-on practice, students build a simple page that introduces themselves, reinforcing the idea that coding can be personal and expressive.
Once the basics of HTML are in place, the session transitions into CSS (Cascading Style Sheets), which gives the page its design. CSS is described as the clothing or paint of the webpage — it defines how content looks and feels. Students learn to change fonts, colors, and layouts, experimenting with different visual effects to see how style transforms a plain page into something engaging.
To solidify learning, students complete a short project where they combine HTML and CSS to create a personalized webpage. This exercise helps them understand how structure and style work together, laying the foundation for building interactive projects later in the bootcamp.
-
Short Description
This section transitions students from static coding into interactive design. Using their knowledge of HTML and CSS, students begin adding interactivity through JavaScript. They create a webpage or a simple game interface that responds to user actions such as clicks, key presses, or mouse movement. The focus is on helping students see how code can create experiences that feel alive, playful, and engaging.
Learning Objectives
Introduce the concept of user interaction in coding projects.
Teach students how to link JavaScript with HTML and CSS to control behavior.
Provide examples of interactive elements such as buttons, score counters, or moving objects.
Encourage creative experimentation with simple game mechanics like start/reset, win/lose conditions, or feedback messages.
Learning Outcomes
By the end of this section, students will be able to:
Connect JavaScript to their HTML/CSS files to make a webpage interactive.
Implement at least two interactive elements, such as clickable buttons, text changes, or movement.
Design a basic game interface (e.g., a simple click game, matching game, or scoreboard).
Reflect on how interactivity changes the user’s experience compared to a static page.
Expanded Description
Students begin by learning how to connect a JavaScript file to their webpage and test simple commands. Facilitators then introduce basic event listeners — code that responds to actions such as clicking a button, pressing a key, or hovering a mouse. Students practice by making elements on the screen change color, move, or display new text when triggered.
Once comfortable with events, students are guided to build a simple game interface. Examples include a counter that increases when a button is clicked, a guessing game that provides feedback, or a simple character that moves across the screen with arrow keys. These exercises highlight the importance of feedback and responsiveness in interactive design.
The session emphasizes creativity by allowing students to personalize their projects. They might add unique backgrounds, themed images, or custom sounds to make their game or webpage reflect their own interests. By the end, students experience the joy of creating something that others can play with — a crucial step toward understanding both vibe coding and game design.
-
Short Description
This section introduces students to the creative side of coding by teaching them how to incorporate digital assets — such as images, sounds, and custom artwork — into their projects. Students also learn how to capture user input, allowing their games or webpages to respond to clicks, key presses, or other interactions. By combining assets with interactivity, participants begin to see coding not just as technical work but as a tool for creative storytelling and immersive design.
Learning Objectives
Teach students how to import and display images, graphics, and sounds in a project.
Show how user input (mouse clicks, keyboard events, text input) can be captured and used to control game elements.
Encourage students to experiment with combining assets and input to create a more engaging experience.
Build awareness of file management and proper organization of digital assets.
Learning Outcomes
By the end of this section, students will be able to:
Add and manage images, audio files, and other assets within a coding project.
Write simple code to play sounds, display graphics, or animate objects.
Use user input to trigger changes in gameplay, visuals, or audio.
Create a small interactive demo that integrates at least one asset and one user input.
Expanded Description
Students begin by learning how to integrate images and sounds into their projects. They practice inserting an image into a webpage or canvas, controlling its size and position, and triggering a sound effect when a button is clicked. Facilitators emphasize the importance of asset management, teaching students to organize files into folders so projects remain structured and easy to update.
Next, the focus shifts to user input. Students learn to detect key presses and mouse clicks, and then use those inputs to control objects on the screen — such as moving a character, starting a game, or triggering visual or audio feedback. This brings their projects closer to feeling like real games, where players interact instead of passively watching.
The session concludes with a mini-project: students combine at least one asset (an image or sound) with one input method to create a playful, interactive demo. Examples might include a character that jumps when the spacebar is pressed or a button that plays a sound effect. This exercise reinforces the link between technical coding and creative expression, showing students how their imagination can directly shape the digital experiences they build.
-
Short Description
This section emphasizes collaboration and creativity by engaging students in a group “vibe coding” activity. Instead of working alone, participants code together in teams, combining their ideas to build small interactive projects. The focus is on experimentation, improvisation, and learning from each other in real time. Facilitators and peers provide immediate feedback, encouraging students to iterate quickly and experience the social, playful side of coding.
Learning Objectives
Teach the value of teamwork and collaboration in creative technology.
Encourage students to experiment freely with code in a supportive environment.
Provide opportunities for peer-to-peer learning and shared problem solving.
Introduce iterative design by incorporating feedback into projects on the spot.
Learning Outcomes
By the end of this section, students will be able to:
Work collaboratively with peers to build a small interactive project.
Share roles within a coding team (designer, coder, tester, presenter).
Apply real-time feedback from peers and facilitators to improve their work.
Reflect on how teamwork enhances creativity and problem-solving.
Expanded Description
In this exercise, students are placed into small groups and tasked with creating a short interactive demo or mini-game within a set timeframe. Each group decides on a simple idea — for example, a button that triggers funny animations, or a basic game where objects move across the screen. Roles are distributed so everyone contributes, whether by coding, designing assets, or testing functionality.
The “vibe coding” format encourages creative improvisation: students are free to experiment without fear of mistakes, treating code like a canvas. As they work, facilitators circulate, offering guidance and answering questions. Teams then share their progress with the class, receiving real-time feedback on what works well and what could be improved.
This process introduces the concept of iterative design: projects don’t need to be perfect at first — they improve through testing and feedback. Students leave with a better understanding of how collaboration sparks new ideas and how feedback can transform a project. They also build confidence in presenting their work to peers, an essential skill for later showcase events.
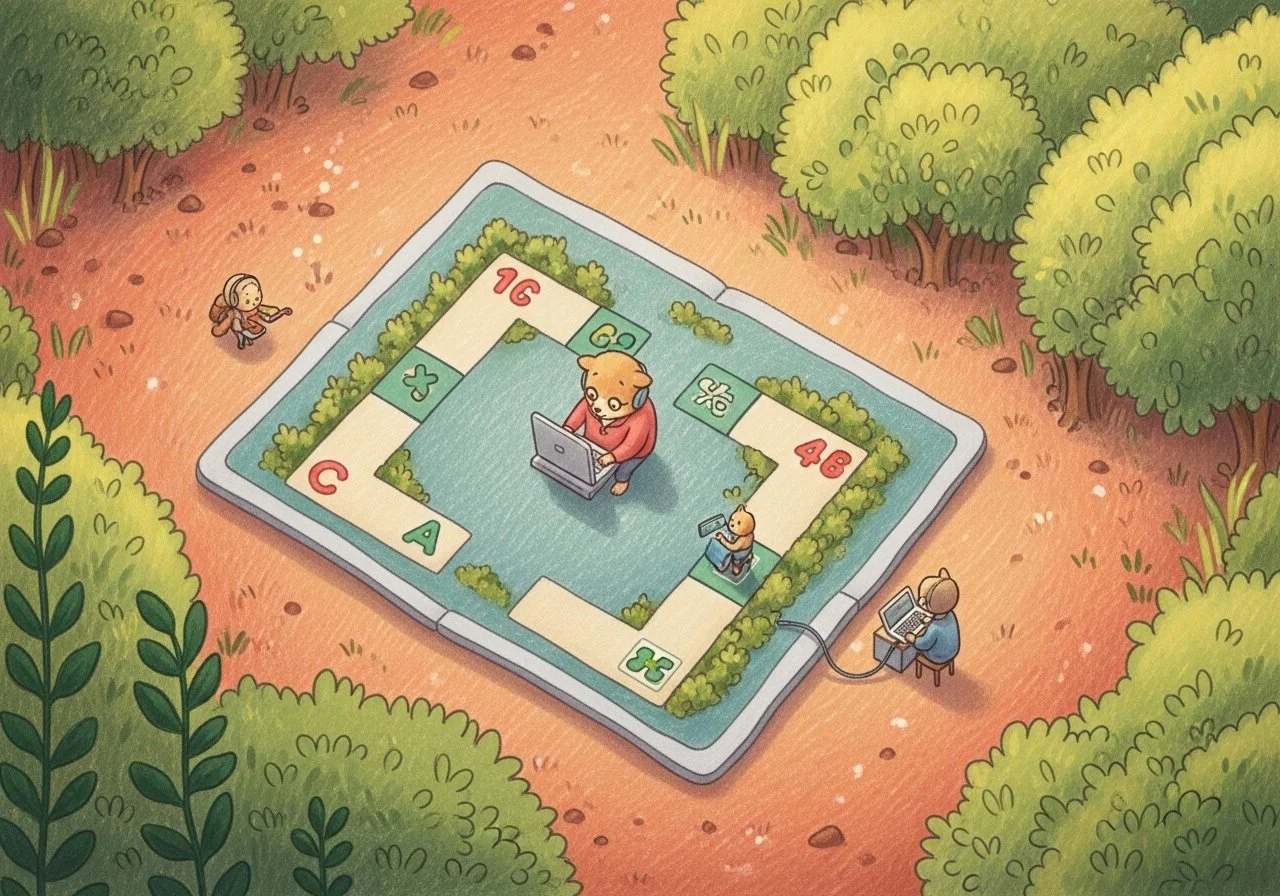
The Cloud Catcher Game
Cloud Catcher Numbers 1-10 provides preschoolers and kindergarteners with a verbal prompt and asks them to find the matching number on the screen. Coded with Gemini 2.5 coder.
Session 3: JavaScript Fundamentals & Playable Prototypes
-
Short Description
This section introduces students to JavaScript, the programming language that powers interactivity on the web. Students learn how variables store information, how functions organize and reuse code, and how events allow webpages and games to respond to user actions. By practicing these core concepts, they gain the foundation to create interactive experiences and playable prototypes.
Learning Objectives
Explain what JavaScript is and how it works alongside HTML and CSS.
Teach the concepts of variables (storing values), functions (reusable code blocks), and events (user-triggered actions).
Show students how to connect JavaScript to their projects to add interactivity.
Encourage experimentation with small interactive tasks to reinforce concepts.
Learning Outcomes
By the end of this section, students will be able to:
Create and use variables to store numbers, text, or other data.
Write simple functions to perform tasks like updating text or moving objects.
Use event listeners to detect clicks, key presses, or other user actions.
Build a small interactive demo that responds dynamically to input.
Expanded Description
Students begin with an introduction to what JavaScript does: it is the “brain” of the webpage, making things move, react, and change based on interaction. Facilitators explain variables as “containers” for information, such as keeping score in a game or storing a player’s name. Students practice by declaring variables and displaying their values on the screen.
Next, students learn about functions — blocks of code that can be reused whenever needed. For example, they might write a function that increases a score, changes the background color, or plays a sound. Functions help organize code and make projects easier to manage.
Finally, the concept of events is introduced. Students experiment with adding event listeners, such as making text change when a button is clicked, or an object move when the arrow keys are pressed. This step brings their projects to life by making them interactive.
By the end of this session, students understand how variables, functions, and events work together to create interactive experiences. They are equipped to start building simple games where players can control actions, see results, and engage with their creations.
-
Short Description
This section expands on JavaScript fundamentals by showing students how to make their projects behave like real games. They learn how to add player controls, track scores, and provide feedback that responds to player actions. These elements transform a simple webpage into a dynamic and engaging game, allowing students to experience the thrill of building something others can play and enjoy.
Learning Objectives
Teach students how to use keyboard and mouse events to create player controls.
Introduce methods for tracking and updating scores or points within a game.
Show how feedback systems (visual or audio responses) enhance the player’s experience.
Encourage experimentation with different interactivity designs to see how they affect gameplay.
Learning Outcomes
By the end of this section, students will be able to:
Implement basic player controls, such as moving objects with arrow keys or clicking buttons.
Create a scoring system that updates in real time as players achieve goals.
Provide feedback through visuals (color changes, animations) or sounds (success or error cues).
Design a simple interactive game loop where input leads to changes in state and output.
Expanded Description
Students begin by learning how to connect player controls to their games. Using JavaScript events, they make objects move with arrow keys, jump when the spacebar is pressed, or react to mouse clicks. Facilitators stress the importance of responsiveness, ensuring controls feel smooth and intuitive.
Next, they add a scoring system. Variables are used to track points, increasing when a player achieves a goal (like clicking a target) and resetting when the game restarts. Students practice updating the score in real time, displaying it on the screen to make the experience more rewarding.
The final piece is feedback, which makes games feel alive. Students learn how to trigger visual effects (like flashing text, color changes, or simple animations) and sounds (such as a “ding” for success or a “buzz” for errors). They see how even small bits of feedback dramatically improve engagement.
By the end of this session, students have transformed static projects into interactive mini-games where input creates immediate, satisfying responses. This milestone builds excitement and confidence, as students realize they are capable of making real, playable games.
-
Short Description
This section serves as the culmination of Phase 1, where students integrate everything they’ve learned about HTML, CSS, and JavaScript into a complete project. Each participant builds a small, fully functional browser game that demonstrates their creativity, problem-solving, and coding skills. This milestone not only reinforces technical knowledge but also gives students a sense of pride in creating something that others can play and enjoy.
Learning Objectives
Guide students through the process of combining HTML, CSS, and JavaScript into one coherent project.
Reinforce the concepts of structure, styling, interactivity, and feedback in game development.
Encourage students to personalize their games with unique themes, assets, and mechanics.
Teach basic debugging and problem-solving skills while finalizing projects.
Learning Outcomes
By the end of this section, students will be able to:
Build a small browser game that includes structure (HTML), design (CSS), and interactivity (JavaScript).
Apply game design principles such as rules, goals, scoring, and feedback.
Demonstrate creativity by customizing their game with visuals, sounds, or themes.
Share a finished, playable project that can be tested by peers and mentors.
Expanded Description
Students begin this session by reviewing all the skills they have acquired: structuring content with HTML, styling with CSS, and adding interactivity with JavaScript. Facilitators guide them in planning a simple game idea — such as a clicker game, guessing challenge, or movement-based mini-game — that can be completed within the session.
Once ideas are chosen, students spend most of the time building, with facilitators circulating to provide support. They learn how to troubleshoot common issues, such as fixing syntax errors, debugging broken interactions, or adjusting layouts. Along the way, they are encouraged to personalize their games, incorporating their own images, sounds, or themes to make their projects unique.
At the end of the session, each student has a playable browser game. Participants share their work with peers, testing one another’s creations and giving positive feedback. This experience reinforces both technical and creative confidence, preparing them for the more advanced Unity projects to come.
-
Short Description
This section introduces students to the importance of sharing and documenting their creative work. They learn how to use GitHub to publish and store their projects, build a simple digital portfolio to showcase their creations, and participate in peer critiques to develop constructive feedback skills. By doing so, students gain early experience in professional practices that emphasize collaboration, visibility, and growth.
Learning Objectives
Teach students the basics of GitHub for project hosting and version control.
Show how to create and maintain a digital portfolio of completed projects.
Develop students’ ability to give and receive constructive feedback.
Reinforce the value of documentation and presentation as part of creative work.
Learning Outcomes
By the end of this section, students will be able to:
Upload and share their completed games on GitHub or a similar platform.
Organize their projects into a digital portfolio suitable for sharing with peers, family, or future opportunities.
Participate in a structured peer critique session, offering supportive and actionable feedback.
Reflect on their own work and identify strengths and areas for improvement.
Expanded Description
Students begin with an introduction to GitHub, where they learn how to upload their browser games, manage files, and share links to their projects. This gives them their first experience with version control, a professional tool widely used in the tech industry.
Next, they are guided to start building a digital portfolio. This may be as simple as a webpage or organized collection of project links, designed to highlight their creativity and technical skills. Facilitators emphasize that portfolios are living documents — tools for self-expression as well as gateways to internships, school applications, or future collaborations.
The session then transitions into a peer critique activity. Students play each other’s games and share feedback using simple frameworks such as “What I liked…” and “One thing I would improve….” Facilitators model constructive feedback, ensuring the process is positive, supportive, and growth-oriented.
By the end of this section, each student has not only completed and shared a project but also gained experience in presenting themselves as creators and in engaging with a creative community through feedback and reflection.
Vibe Coding Foundations Bootcamp – FAQ
-
This 20-hour bootcamp introduces students to creative coding and interactive game design using HTML, CSS, and JavaScript. It is designed as the perfect entry point into coding for beginners, focusing on building simple, playable browser games while learning the foundations of digital creativity.
-
The course fee is $199 CAD for the full 20-hour program.
-
The program runs for 20 hours, typically delivered in weekly sessions over 3 weeks. Each session includes hands-on learning, group collaboration, and guided mentorship.
-
Students will cover the following content:
Session 1: Orientation & Digital Creativity Kickoff
Program overview, introductions, and community building
Introduction to creative tech careers and entrepreneurship
Game Design Theory (mechanics, dynamics, aesthetics)
Setting up VS Code and browser-based coding environments
Session 2: HTML, CSS & Interactive Game Elements
Basic HTML structure (text, images, links) and CSS for styling and layout
Building interactive webpages or simple game interfaces
Integrating digital assets (art, sounds) with user input
Team “vibe coding” collaborative exercise with real-time feedback
Session 3: JavaScript Fundamentals & Playable Prototypes
JavaScript basics: variables, functions, and events
Adding interactivity to games (controls, scoring, feedback loops)
Completing a simple playable browser game project
Sharing projects on GitHub, creating digital portfolios, and peer critique
-
By the end of the course, students will be able to:
Understand the foundations of coding with HTML, CSS, and JavaScript.
Create interactive webpages and playable browser games.
Apply basic game design theory to make games engaging and fun.
Integrate digital assets (images, sounds) and capture user input.
Share projects online via GitHub and build a starter digital portfolio.
Give and receive constructive feedback through peer critique.
-
This course is ideal for youth and beginners with little or no prior coding experience. It’s a great starting point for those interested in creative technology, game design, or digital storytelling.
-
Access to coding environments (VS Code setup guidance and browser-based tools).
Hands-on mentorship from facilitators.
Peer collaboration and teamwork exercises.
Extra help through office hours and shared digital resources.
-
A laptop capable of running VS Code or a browser-based coding platform.
An open mind, creativity, and willingness to collaborate with peers.
-
Students can:
Continue developing their skills by building more games and interactive projects.
Expand their digital portfolios for school or career opportunities.
Progress to the Unity Game Development Course, where they’ll advance into 2D/3D game creation with professional industry tools.
Program Facilitators
-
![]()
Mario Xu
NRIDL Managing Director
McMaster Engineering Bachelor
Harvard University Master
Over 15 years of project management and education facilitation
-
![]()
Anthony Tecsa
Waterloo University - CS
Senior Software Developer
Built numerous AI applications
-
![]()
Harry Geng
Waterloo University - Math/Statistics
Software Coach
Built numerous AI applications
-
![]()
Julia Wang
OCAD University - Design
Illustration and UI/UX Designer
Program Coordinator